Thursday, March 13, 2014

Tender Little Seedlings.

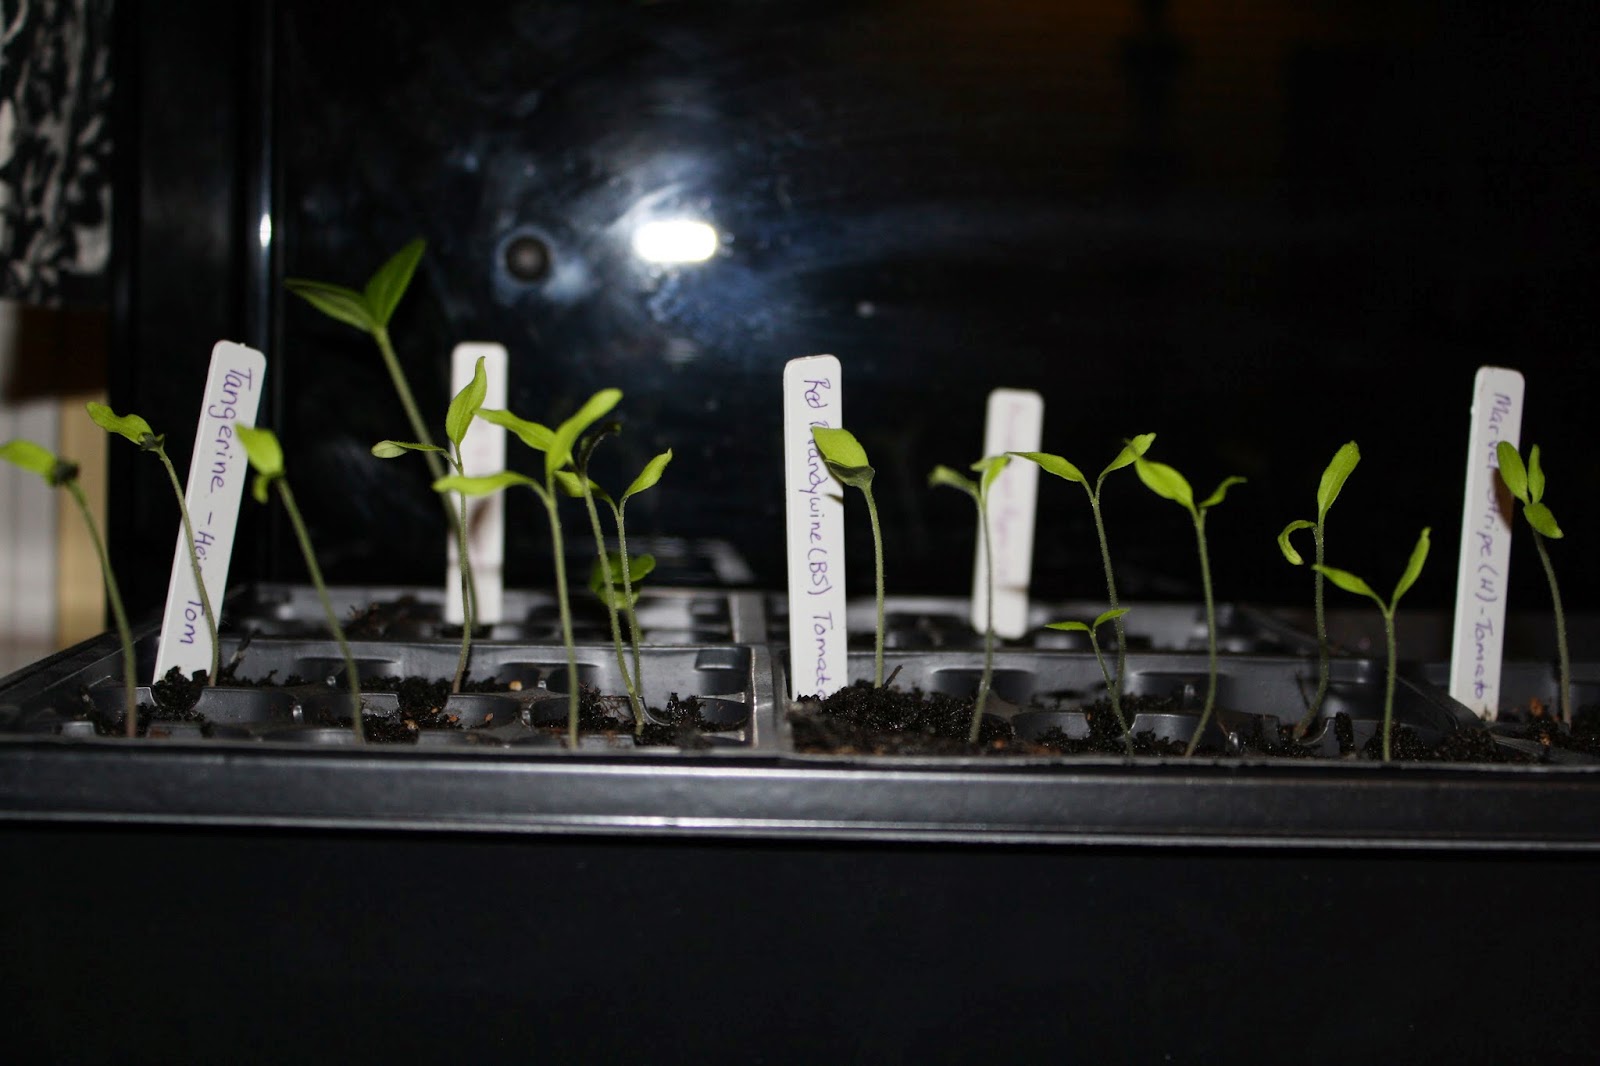
Its March! Its the time for seeds, its the time for turning the garden, for renewing your beds, and for taking a breath of relieve for we know that spring is on its way.  Around the house we have signs of spring everywhere, the crocuses are coming up, the daffodils are well on their way and the birds are starting to sing before dawn.  What this also means is that roughly three weeks ago in February I hunkered down and planted some seeds indoors and have continued to do so, allowing for those tender plants to have a longer growing season.

And what have I planted thus far? I am SO glad you asked. In February I planted Cucumbers, 4 breeds of tomatoes, Fennel, Cauliflower, Celery, Purple Basil, and Broccoli. All of the seedlings are coming up beautifully as you can see from my photos.


Slow Cooked Split Pea Soup (Gluten Free)

I love to cook, its a simple fact. I receive great joy from creating wholesome and nutritious meals which I can create with my own hands for the benefit of others. Also, I am a follower of the slow food movement - I truly believe that homed cooked and thoughtful meals feed the body and soul far more holistically than any pre-packaged food is capable of.

Today is a rainy day in lovely New Westminster, the perfect day for a slow cooked pea soup.

Cook time 1 hr. (roughly - could be more, could be less, I don't know why - its the arcane magic of cooking)

Prep Time: 2hrs (for peas to soak)

Ingredients:
2 Cups Dried Split Peas
2 Containers Chicken Broth
1 Medium Onion (Diced Small)
2 Carrots (Diced Small)
1 Tbsp Butter
1 Tbsp Olive Oil
4 Bay Leaves
Salt or Herbamare to taste
1 tsp White Pepper (Optional)
2 tsp Better than Bouillon Chicken (Optional)
1 strip of smoked bacon (Optional)


It is always best to soak your split peas in hot water. I generally soak mine for 2 hours before cooking. Don't forget to rinse them well or they will produce a foamy sludge on the top of your soup.


Once your peas are done soaking and are rinsed, let them stand and drip a bit while you gather the remaining ingredients.


Add your 1 tbsp of butter and 1 tbsp of oil to your pot, heat on med/low. Add your onions and carrots, white pepper, bay leaves and optional ingredients. Stir for 10 to 12 minutes until onions are translucent - you can add a bit of chicken broth if things start to cook too fast.


At this point, taste the reduced broth with vegetables to make certain it is to your liking, I am an avid taste tester while cooking, making certain that the balance of salts, herbs, vegetables and meats are producing the flavors that I want. Remember, staggering ingredients will layer your flavors and make some more intense, depending on your palate you may want to do this.

Once the onions are soft and the balance of your base is to your liking, add the split peas, stir all ingredients together to coat the peas, allow it to cook while being stirred about 5 to 10 minutes.


Once all ingredients are coated, add your 2 containers of chicken broth. Stir from the bottom and reduce to low heat. Cover and reduce heat to low, cook for 1 hour - check on your soup every 15 to 20 minutes, stirring from the bottom and testing for taste. The soup should be at a medium simmer for this first hour


At about the 35 to 40 minute mark you will notice that your broth has reduced - this is perfectly normal. If the flavors are becoming too intense or too salty, add a half cup of water until it is to your liking. IF by any chance you see a foam at the top of your soup, simply skim with a spoon, this is caused by the peas not being fully rinsed.

Soup will be done when the peas are mashy and soft  and fall apart into a green pea goo in your mouth, though it will be a delicious goo - Oh, and I forgot to take a picture of the finished product, oh well. Enjoy your soup!

- Nicey


Sunday, September 1, 2013

A House, a house! We bought a house!

In the excitement of moving and bringing the blog up to par, I failed to mention we finally bought a house! The home is adorable and is 103 years old (built in 1910). As with most older homes it has a few problems, but what it lacks in updated items, it makes up in charm.


I am looking forward to clearing out the yard and putting in my huge herbal garden and vegetable garden!!

Medical Herb - Yarrow

I am sure many people blog about herbs, but as a student of medical herbalism and a person who was fortunate enough to grow up with herbal medicine as a partner to western medicine, I occasionally like to share what I know.

Today I would like to talk about one of my absolute favorite herbs - Yarrow.


Yarrow's scientific name is Achillea Millefolium and is a member of the aster family, traditionally it is native to Europe and Asia. North America has a variety of the plant as well (also called Yarrow) Achillea Millefolium var. Ianulosa both varieties are completely interchangeable.

Yarrow is an absolute amazing herb and influences the circulatory system, the digestive system, and the nervous system.

Yarrow can be used in the following:
  • circulatory issues ( used as a hemostatic or normalizer of the blood and circulation)
  • hemorrhoids
  • wounds
  • bruises (associated with cuts, or bruises that have become hard)
  • fevers (acute fever, rapid pulse, sudden onset with chills)
  • digestive issues
  • provoke menses
  • menstrual cramping
  • uterine fibroids
  • headache and nosebleeds
The above items are a sample of uses, there are many more ( feel free to send me a message with questions).

The whole plant is used fresh, though the most preferred portion are the tops. The flower tops are harvested within the first couple days of blooming and dried for use in teas and tinctures (suspended in alcohol). I also enjoy using the fresh herb and grinding it into a poultice for bruises, also it works wonders as a wound cream.

As with anyone putting up info of this nature, this is not used to diagnose, treat or cure any medical issue, nor am I a Doctor.


Saturday, August 31, 2013

Apple Fritters for Early Autumn

Though summer is not technically over, its still nice to start using the bounties of the fall harvest as they become available. For me, nothing conjures up images of the fall more then apples, and specifically Jazz apples! Our local organic store has them coming in by the truck loads and I am quickly snagging them up to make apple butter, canned apple pie filling, apple jelly, and dried apples for later in the ear as snacks and oatmeal toppings.

  With the beginning of the apple bounty upon us, I wanted to share one of my favorite breakfast recipes, "Amish Apple Fritters". I don't know if they are actually Amish, but they sure are delicious!


Here is your list of your ingredients:
 
 
1 1/4 Cup of Flour
2 tsp Baking Powder
1/4 tsp Salt
2/3 Cup Milk
1 Egg
4 Grated Apples (I highly suggest Jazz apples)
Vanilla (A cap full)
Lemon Zest (to taste)


For those of you who are wheat and dairy free, this recipe works with substitutions, I like almond milk, and Toms Red Mill makes a fantastic gluten free flour.


To start, mix your dry ingredients: Flour, Baking Powder, Salt.

Put your pan on - if you have cast iron it is best. You will need 1 inch of your preferred cooking oil, I use coconut oil for all my frying. If you do not have that, try grape seed as it has a higher heat tolerance. Canola is crap for you and olive oil will burn.


Next, grate your apples and set them aside.


Once your dry ingredients are properly mixed (by hand or by blender), slowly add your wet ingredients: Milk, Egg, Apples, Vanilla, Lemon Zest.

Make sure there are no doughy lumps, your batter will be a little runny which is fine, it will stiffen up once it hits the heat of the griddle.


Spoon large table spoon amounts of dough onto your hot griddle and fry on each side until golden (generally about 2 to 3 minutes, be careful to check your center, it should be cooked all the way through.


Once the fritter is done, place them on a plate lined with paper towel, sprinkle with sugar while they are still hot.

Let them cool just a bit and enjoy with a cup of English breakfast tea, or beverage of your choice!

Happy Eating!
-Nicey

Friday, December 21, 2012

Seed Saving and Good Mutations

Last year was our first garden at the new house. We are renters and are lucky in the fact that our landlord hates yard work - he has been really wonderful in giving us free run of the front yard which is quite a substantial size. Because of this we turned the entire east portion into a raised bed garden. We did fairly well, but we also made some mistakes in not knowing quite how the light moved in our yard-in all honesty I should have paid more attention. Some of our plants like our tomatoes which were in a full sun location did amazingly well, while others like our kale which hardly got any sunlight due to a large oak tree- ended up stunted.

With spring approaching we will be pulling up the remaining lawn on the east portion of the lawn and simply making a full size garden from this portion of the yard (I will document this as we start the project). I have already made a list of vegetables and herbs which I will be growing in our Pacific Northwest zone 5 garden which will be mostly root vegetables, leafy greens, and medicinal herbs - not to mention one hot housed tobacco plant for a friend of ours.

In all the excitement of simply having a garden last year, I failed to do one very important things - Save Seeds. I have never saved seeds and have always just purchased the organic variety of various veg for the next garden - as I have learned, this is much to my detrament.

This months Urban Farm magazine had a really interesting little side article which I thought to share with you in regard to saving seeds, and how plants change according to their environment, passing this unspoken knowledge to the next generation (seed).

Saving Seeds:
"You're Really doing yourself a disservice if you're not saving seeds. Each plant becomes acclimated to your soil, to your microclimate and to your space spacifically, and will produce seed that will be rislient in your specific conditions.

The use of only open- pollinated seeds and learning to save seed are important elements to increasing  yield overtime. Hybrid seeds produce plants that are either sterile or untrue to type. Open-pollinated seeds will produce plants that will be pollinated by insects or by wind and will produce viable, true seed. Cross pollination is possible, seed saving is actually less cimplicated in urban areas than rural areas. Corn, for example is wind pollinated. Its more difficult to get far enough away from other corn crops that can contaminate your seed in rural areas, than it is in urban areas.

Each year, successful plants in a garden make seeds with slightly different characteristics. Plants adapt to their environment. Seed grown in a certain locale will be genetically different than seed from any other area. See saved in a certain area becomes tailired to the area's specific conditions, leading to greater plant vitality. Seed saving not only increases the resilience of your plants, but it also saves money and fosters genetic diversity in our seed supply." - Urban Farm January/February 2013 pg 24 Biointensive Article.

Saturday, November 3, 2012

Rainbow..

When I was a young girl, I remember hearing about this..and also the indigo babies.